Hosting your full stack apps for 5$ a month with Digital Ocean and Dokku
Services like Netlify and GitHub Pages have made hosting static sites trivial - make an account, link up your github account, select a repository, click deploy. That's it. That's all there's to it. This has made it much easier for beginners to get their sites online, and I love it.
The story is a bit more complicated for full stack apps unfortunately. If you're using PHP - there a many hosting providers that will host your stuff for next to nothing. Your options are a bit more limited if you want to host something like a Node.js application or something written in Java, Kotlin, Ruby or whatever else. You could...
- Platform as a Service (PaaS): host on a service like heroku, Digital Ocean App Platform or AWS Amplify (convenient, but gets expensive for multiple apps)
- Infrastructure as a Service (IaaS): set up your own server on AWS, Google Cloud Platform, etc. (a good bit more complicated, and you still have to pay)
- Physical server: run your own server on a spare device or something like a Raspberry Pi (fairly complex and not as reliable)
Heroku does have a free tier, but there are some limitations. Most importantly, your server will go 'dormant' when it's not getting requests, causing the initial load to be quite slow sometimes. I don't really like any of these options for small hobby projects, so I want to share a technique that has worked well for me: run a single Dokku Droplet on Digital Ocean for all your apps.
What is Dokku and why do I need it?
If Dokku sounds a bit like Docker - that's no coincidence. Dokku bills itself as a "Docker powered mini-Heroku. The smallest PaaS implementation you've ever seen." Basically, you can run it on any old server and get a developer experience similar to Heroku. If you haven't played around with Heroku - essentially that means it will work very similar to Netlify, but for full-stack apps. You link up a git repo, push a branch, and the app gets build and deployed. You can even spin up and connect a database with a few commands. It's awesome!
Where do I get a Dokku server though?
You might think setting up a Dokku server sounds like a hassle, but it's actually not so bad - this is where Digital Ocean comes in. They have a ready-made server type that comes with Dokku pre-installed. Pretty handy! You can totally host Dokku on other hosting providers that give you access to a Virtual Machine, Digital Ocean just makes it very simple. There's still a bit of set-up, but it's manageable.
Alright - now that you know where we're headed - let's get going. I'll walk you through this step-by-step.
Step-by-step guide
Step 1: Build an app
You probably already have something in mind, but this will be easier to show with an actual app. For simplicity, I am using the app from the MDN tutorial on building an app with the express framework (Node.js/JavaScript) (that tutorial also has a great section on deployment, which may be worth your time - they don't cover Dokku though...). I've just gone ahead and forked the repo, so I have it in my own GitHub account.
Step 2: Set up your Dokku droplet
If you don't have a Digital Ocean account yet, go ahead and sign up, it's free. You will need to pay for the droplet, but they bill by the minute, so if you shut your droplet down again after working through this example, you should only have to pay a few cents. Next, you'll want to create a new droplet (a droplet is a virtual machines to run your server on). There's a bunch of options to choose from here, but we'll search for the Dokku droplet on the marketplace tab.
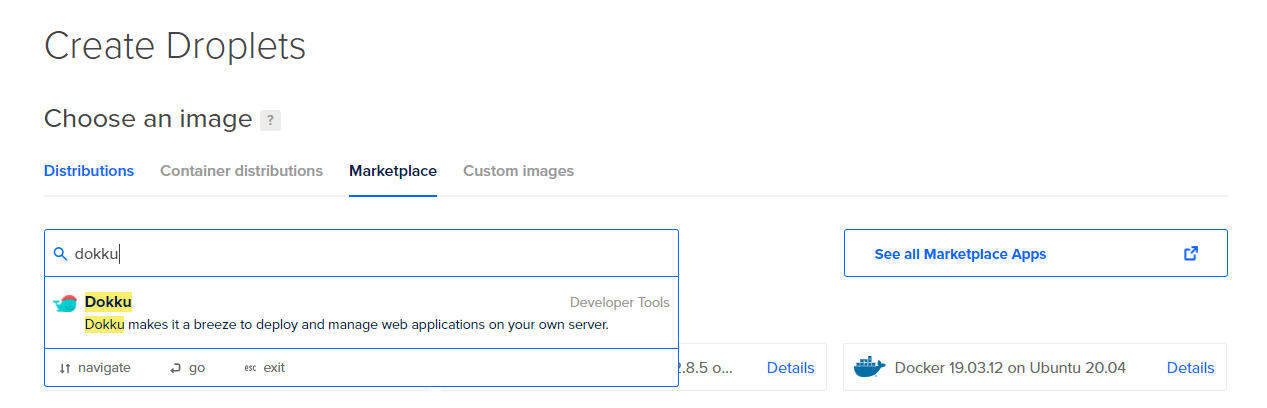
Choose the cheapest plan (5$ as of January 2021) and the datacenter closest to you and your target audience. Finally, you will have to select an SSH key for connecting to the server - you do this by adding your public key to digital ocean and selecting it. If this is unfamiliar territory to you, you can read more about it in their guide. Finally, pick a memorable name for your droplet and submit the form.
It should only take a minute or so for your droplet to be created.
Step 3: Configuring Dokku
Once your droplet is ready, visit its IP address, by clicking on it and pasting it into your browser.

On the page you will see, you only really need to do a couple of things:
- check the box for using virtualhost naming for apps
- enter the hostname you want to use

You will typically want to put each of your apps on its own subdomain below the one you specify here. For example, I have selected apps.sweller.de here, so my apps would be available under somename.apps.sweller.de. In principle, you can also use a top-level domain here though.
Step 4: DNS settings
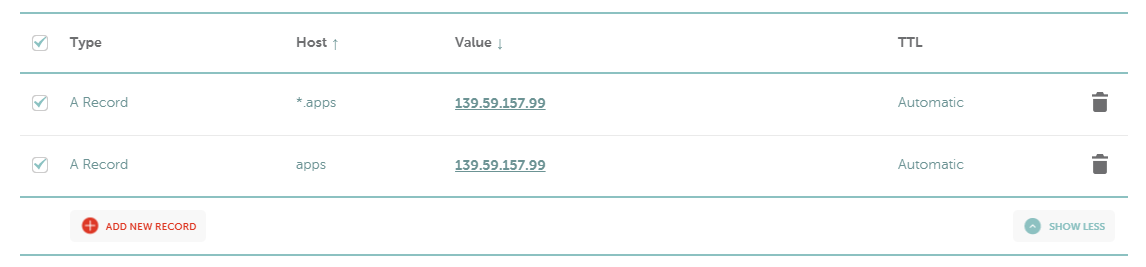
To direct traffic to your subdomain to your app, you need to configure two A-records on your domain host - one for the subdomain and a wildcard one for any subdomains below that. I am using namecheap here.
Step 5: Set up your app
To get started, use ssh to connect to the server at the IP address you can see in your Digital Ocean account. For me that would be ssh root@139.59.157.99. You will only be able to connect if you are using the private key for one of the public keys you provided when setting up your droplet.
Now you're on the dokku server, you can create a new app using the command dokku apps:create appname. For our example, I am going with dokku apps:create locallibrary here.
We need a mongodb database for this, so let's install dokku-mongo on the dokku server with sudo dokku plugin:install https://github.com/dokku/dokku-mongo.git mongo. Similar plugins exist for other types of databases like PostgreSQL. Once that's done we can easily create a mongodb database by running dokku mongo:create locallibrary-db. Next, we link that database to our app with dokku mongo:link locallibrary-db locallibrary. This will add an environment variable MONGO_URL that the app can use to connect to the database.
Finally, we should to add a letsencrypt certificate to enable https. Let's install one more plugin to do that with dokku plugin:install https://github.com/dokku/dokku-letsencrypt.git. The first time you do this, you need to provide an email to use by running dokku config:set --global DOKKU_LETSENCRYPT_EMAIL=your@email.tld. Replace your@email.tld of course. Now we can run dokku letsencrypt myapp to create the certificate. Finally, run dokku letsencrypt:cron-job --add to set up a cronjob that will automatically renew the certificate for you.
That's all we need to do here, so use exit to leave the server. Back in our repo directory, we now add a new remote to our repo by running git remote add dokku dokku@apps.sweller.de:locallibrary. Replace the stuff after the @ sign with the subdomain you set up and the name of your app.
Step 6: Deploy your app
Now we're ready to deploy our app.
Push the app to the server with git push dokku master. Dokku should recognize what kind of app it is, build it and deploy it to the server. This might take a couple of minutes. Once it's done - your app is deployed.
Was that really worth the trouble?
Wow, that was a lot of work. What do we get for our troubles? We now have a functioning app with a database and https support on https://locallibrary.apps.sweller.de/ (I've taken the droplet down though, so the link is dead). We can re-deploy it after making changes by running a single command (git push dokku master). If you want to deploy another app, you only need to go through steps 5-6 again, so that's when you start really reaping the rewards. You can easily host multiple apps on a single Digital Ocean droplet.
What do you think? Will you try this for your next project?
PS: If your app has a lot of dependencies, the server might run out of memory when it tries to run the build (these cheap droplets don't have much memory). Before you upgrade it, it's worth configuring some swap memory.